Add your WordPress site in CrawlHunt
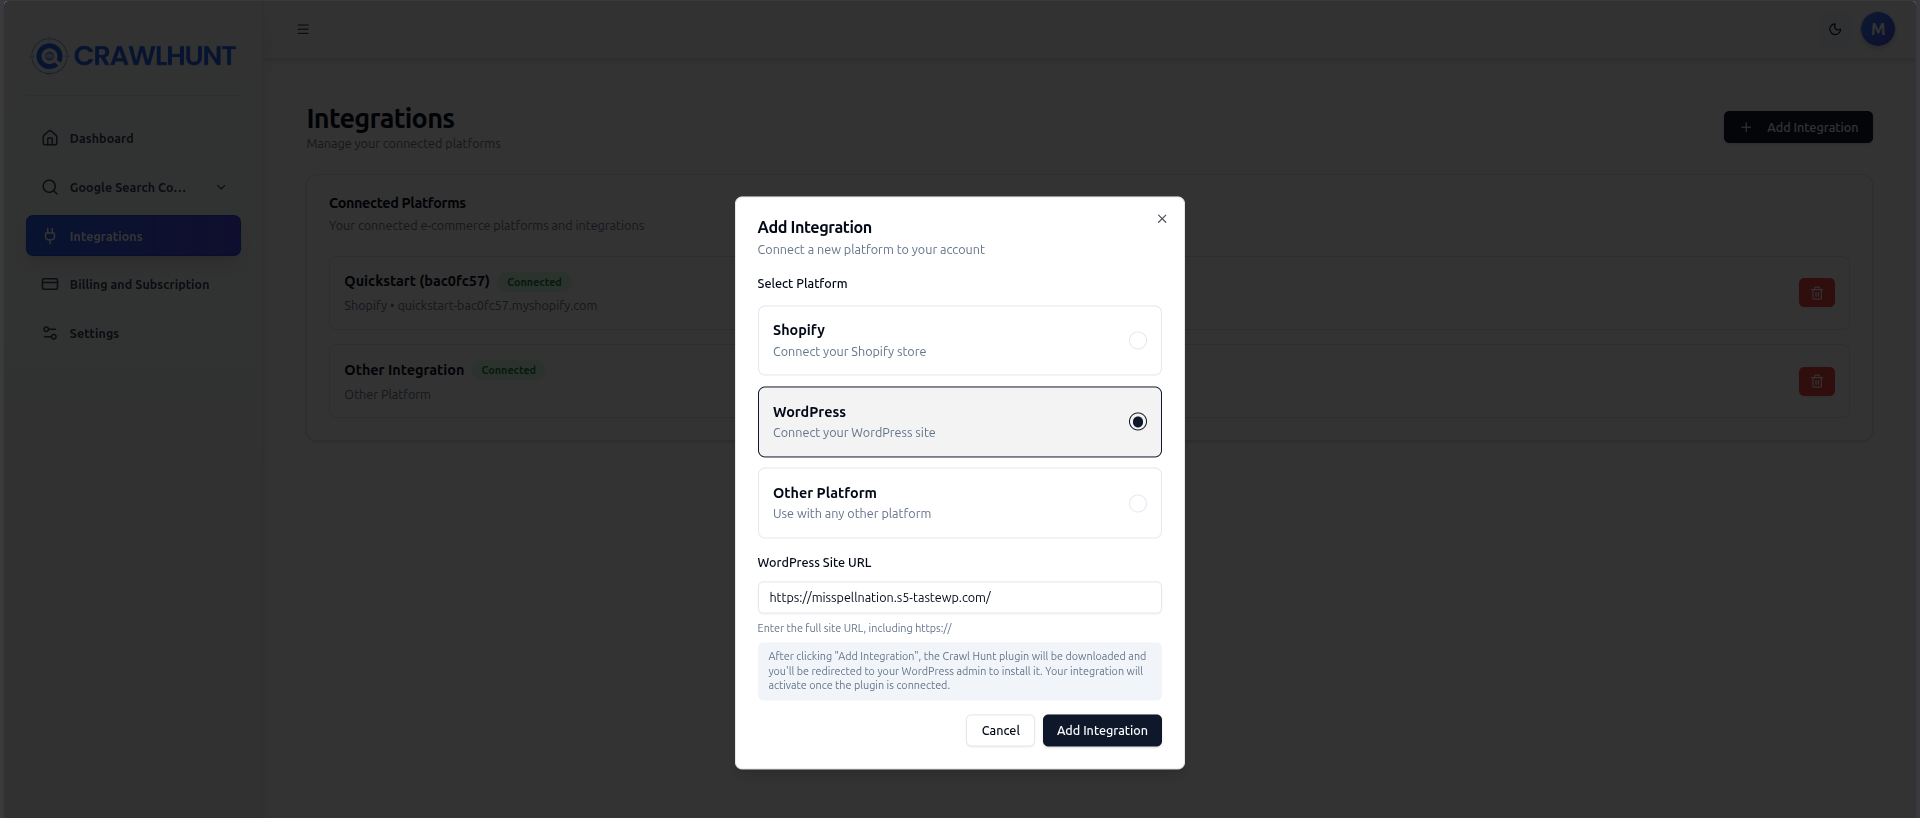
Go to the Integrations page in your CrawlHunt dashboard and click Add Integration. Select WordPress as the platform, enter your WordPress site URL, and click Add Integration to proceed.

This guide walks users through installing the CrawlHunt WordPress plugin, connecting it to their CrawlHunt account, and running their first SEO audit directly from WordPress.
Follow each step in order. Open any screenshot at full size to see the details.
Go to the Integrations page in your CrawlHunt dashboard and click Add Integration. Select WordPress as the platform, enter your WordPress site URL, and click Add Integration to proceed.

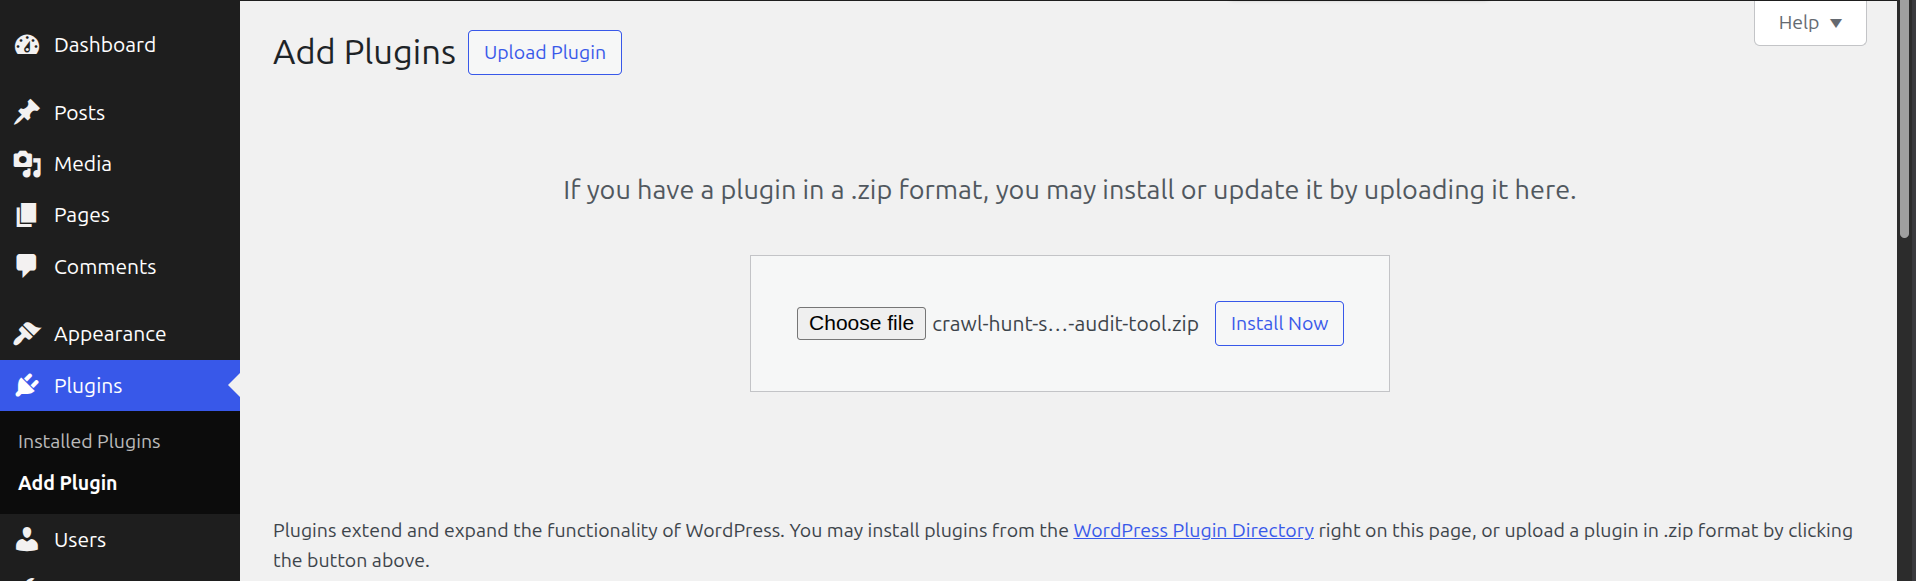
Install the plugin directly from your WordPress admin area by searching for CrawlHunt, or upload a downloaded ZIP file manually.

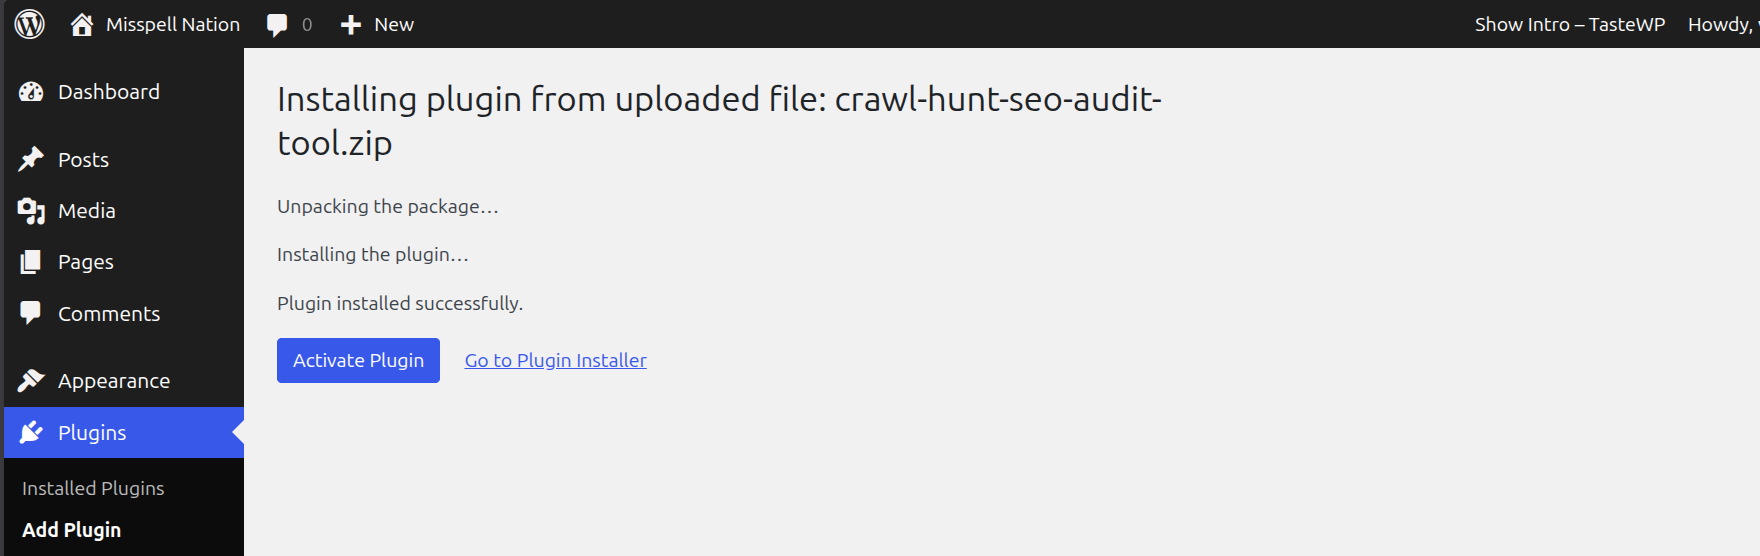
After WordPress finishes installing the plugin from the uploaded ZIP file, click Activate Plugin to enable CrawlHunt on your site.

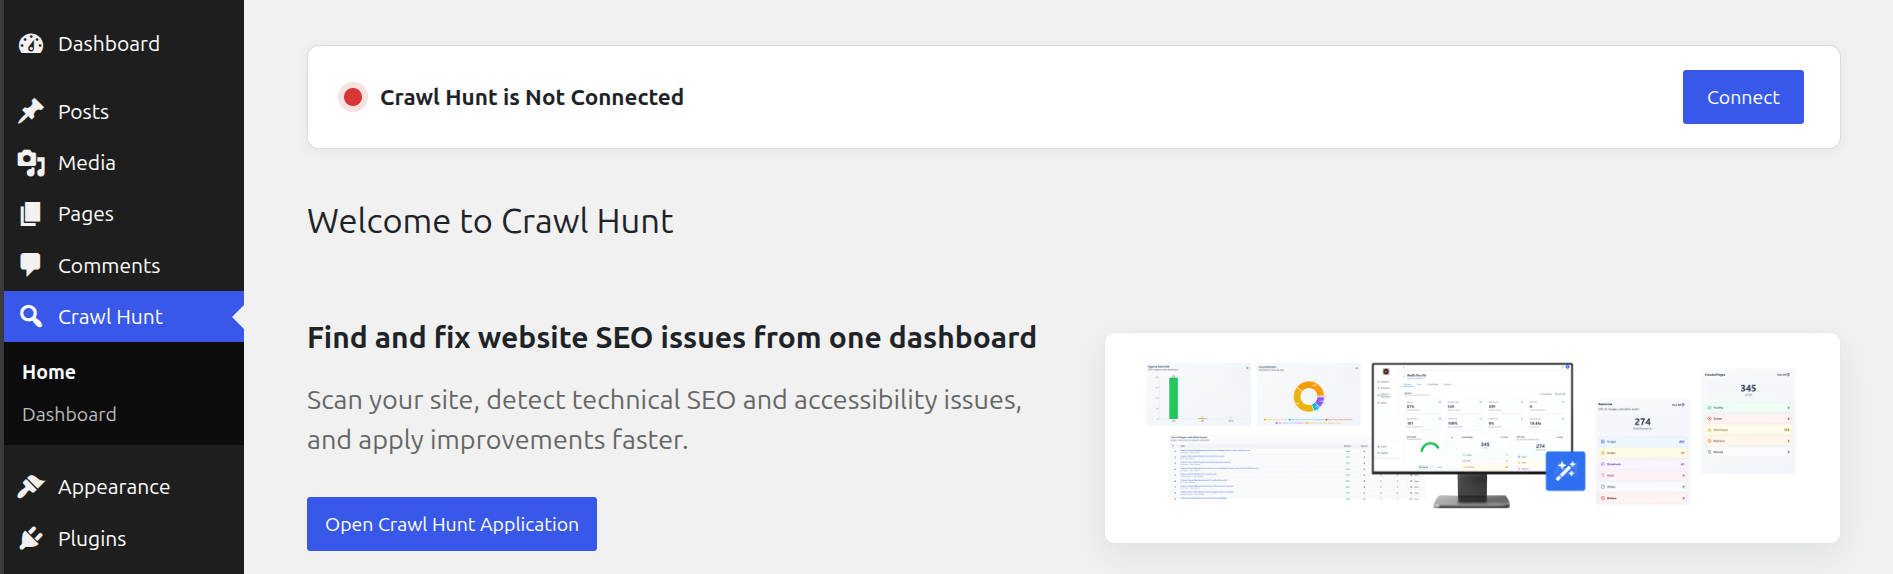
After activation, open the CrawlHunt menu item in the WordPress sidebar. The plugin will show a 'Crawl Hunt is Not Connected' status — click Connect to link it to your CrawlHunt account.

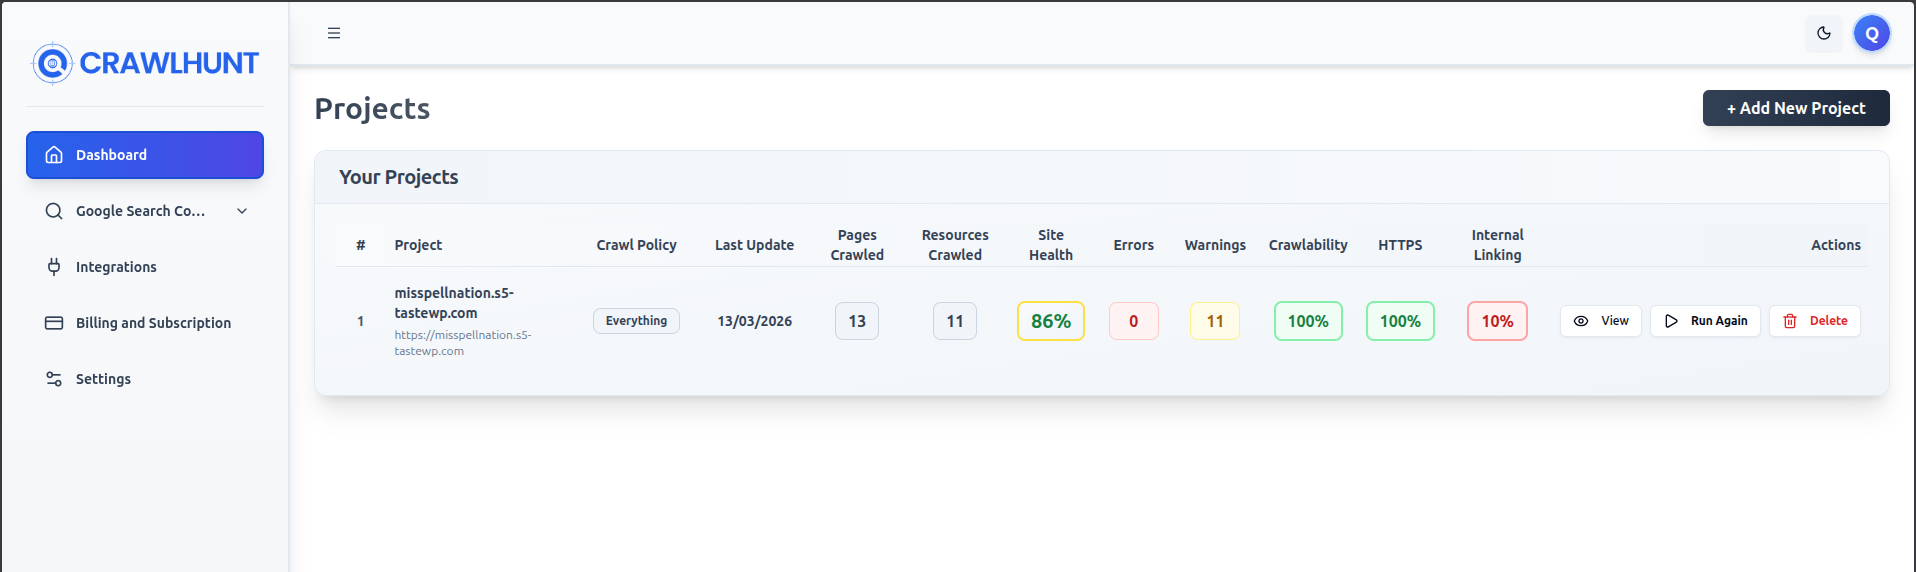
Once connected, CrawlHunt will automatically create a project for your site. Head to the Projects page in your CrawlHunt dashboard to see the crawl results, including site health score, errors, warnings, crawlability, HTTPS status, and internal linking score.

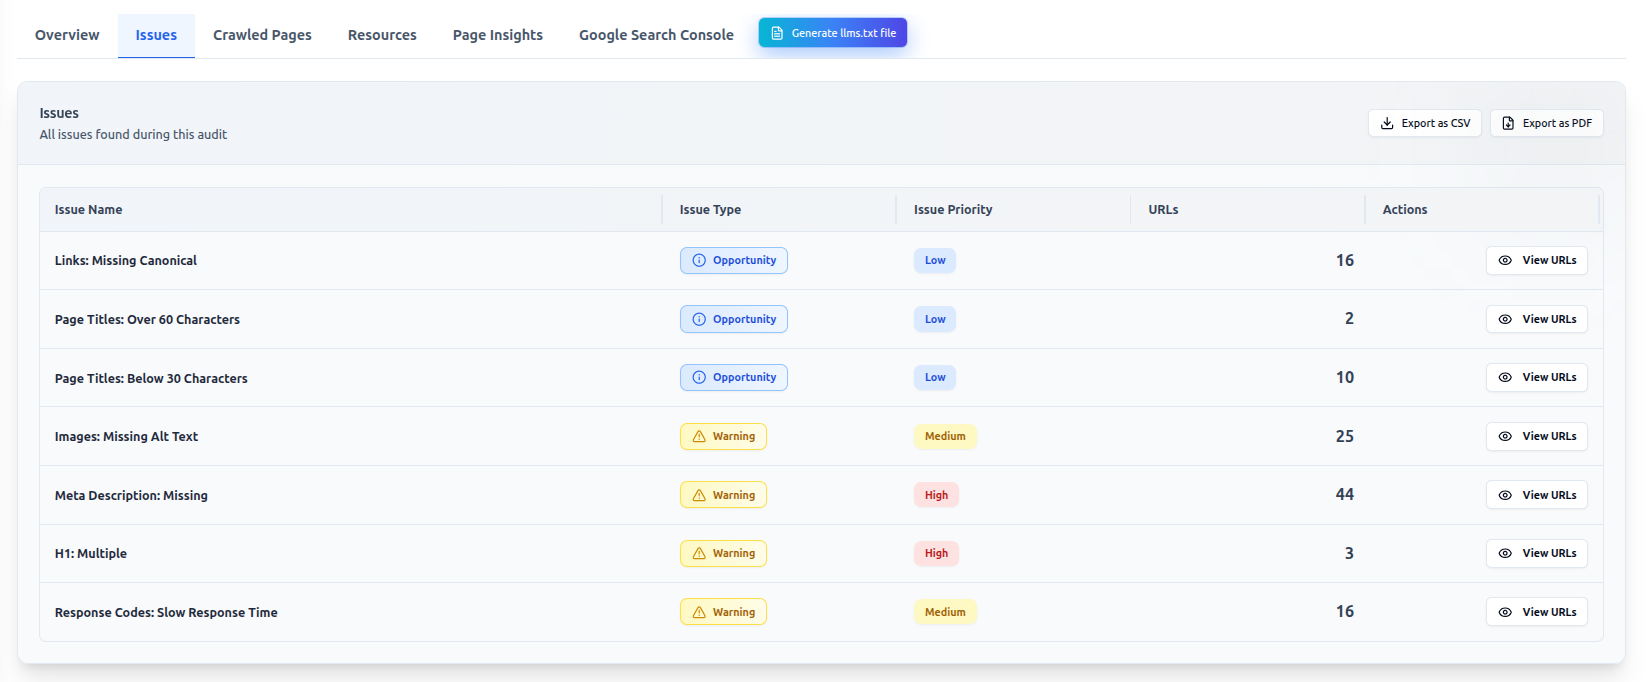
Click View on your project to open the audit results. Navigate to the Issues tab to see a full list of detected SEO issues categorized by type and priority, including missing meta descriptions, image alt text, canonical tags, and more.

Open CrawlHunt to start auditing, or head back to the integration overview.